Enable/Disable 3D Menus In Windows XP

Start –> Run –> Type Regedit –> Hit enter.

Browse to HKEY_CURRENT_USER\Control Panel\Desktop

Double click the Reg Binary “UserPreferencesMask”

To enable 3D menus type: 9E 3E 05 80 (under value data)

To disable 3D menus type: 9E 3E 07 80 (under value data)

Reboot.

Completely Remove Windows Messenger (Windows XP)

Click Start –> Run.

Paste the following:

RunDll32 advpack.dll,LaunchINFSection %windir%\INF\msmsgs.inf,BLC.Remove

Click ok.

-----------------------------------------------------------------------------------------------------

Note: If you have service pack 1 installed, you may receive a message telling you that there was an error unregistering the OCX 16422.  Just click ok--windows messenger will still be uninstalled.

Using The Microsoft Security Essentials Command-Line

How To Run The Microsoft Security Essentials Command-Line

Start –> run –> type cmd –> hit enter.

Paste the following: "%ProgramFiles%\Microsoft Security Essentials\MpCmdRun.exe"

Hit enter.

List of Commands


  • -? / -h     Displays all available options for this tool.

  • -Trace [-Grouping #] [-Level #]     Starts diagnostic tracing

  • -RemoveDefinitions [-All]     Restores the installed signature definitions to a previous backup copy or to the original default set of signatures

  • -RestoreDefaults     Resets the registry values for Microsoft Antimalware Service settings to known good defaults

  • -SignatureUpdate [-UNC]     Checks for new definition updates
    -Scan [-ScanType]     Scans for malicious software

  • -Restore -Name <name> [-All]     Restore the most recently or all quarantined item(s) based on name

  • -GetFiles     Collects support information

Using The NirLauncher From NirSoft

Start Using NirLauncher

Download the beta version of NirLauncher from here.

Open your hard drive—the one you wish to store NirLauncher in. Right click, select new –> folder. Extract the contents of the download into that folder.

Double click nirlauncher.exe to launch NirLauncher. You should see a screen like the following:

nirlauncher

-----------------------------------------------------------------------------------------------------

Adding Additional Software Packages to Nirlauncher

Below is an example on how to add an additional software package to Nirlauncher. For this case, we will be using the Sysinternals suite from Microsoft.

Download the latest version of the Sysinternals suite from here.

Open the same drive you used to store Nirlauncher in and create a new folder. Extract the contents of Sysinternals into that folder.

Open Notepad i.e. Start –> Run –> Notepad –> enter. Paste the following:

[General]
SoftwareCount=69
GroupCount = 3
Name=SysInternals Suite

[Group0]
name=PsTools

[Group1]
name=Other Console Tools

[Group2]
name=GUI Tools

[Software0]
exe=accesschk.exe
group=1

[Software1]
exe=AccessEnum.exe
group=2

[Software2]
exe=ADExplorer.exe
group=2

[Software3]
exe=ADInsight.exe
group=2

[Software4]
exe=adrestore.exe
group=1

[Software5]
exe=Autologon.exe
group=2

[Software6]
exe=autoruns.exe
group=2

[Software7]
exe=autorunsc.exe
group=1

[Software8]
exe=Bginfo.exe
group=2

[Software9]
exe=Cacheset.exe
group=2

[Software10]
exe=Clockres.exe
group=1

[Software11]
exe=Contig.exe
group=1

[Software12]
exe=Coreinfo.exe
group=1

[Software13]
exe=ctrl2cap.exe
group=1

[Software14]
exe=Dbgview.exe
group=2

[Software15]
exe=Desktops.exe
group=2

[Software16]
exe=diskext.exe
group=1

[Software17]
exe=Diskmon.exe
group=2

[Software18]
exe=DiskView.exe
group=2

[Software19]
exe=du.exe
group=1

[Software20]
exe=efsdump.exe
group=1

[Software21]
exe=handle.exe
group=1

[Software22]
exe=hex2dec.exe
group=1

[Software23]
exe=junction.exe
group=1

[Software24]
exe=ldmdump.exe
group=1

[Software25]
exe=Listdlls.exe
group=1

[Software26]
exe=livekd.exe
group=1

[Software27]
exe=LoadOrd.exe
group=2

[Software28]
exe=logonsessions.exe
group=1

[Software29]
exe=movefile.exe
group=1

[Software30]
exe=newsid.exe
group=2

[Software31]
exe=ntfsinfo.exe
group=1

[Software32]
exe=pagedfrg.exe
group=2

[Software33]
exe=pendmoves.exe
group=1

[Software34]
exe=pipelist.exe
group=1

[Software35]
exe=portmon.exe
group=2

[Software36]
exe=procdump.exe
group=1

[Software37]
exe=procexp.exe
group=2

[Software38]
exe=ProcFeatures.exe
group=1

[Software39]
exe=Procmon.exe
group=2

[Software40]
exe=psexec.exe
group=0

[Software41]
exe=psfile.exe
group=0

[Software42]
exe=psgetsid.exe
group=0

[Software43]
exe=Psinfo.exe
group=0

[Software44]
exe=pskill.exe
group=0

[Software45]
exe=pslist.exe
group=0

[Software46]
exe=psloggedon.exe
group=0

[Software47]
exe=psloglist.exe
group=0

[Software48]
exe=pspasswd.exe
group=0

[Software49]
exe=psservice.exe
group=0

[Software50]
exe=psshutdown.exe
group=0

[Software51]
exe=pssuspend.exe
group=0

[Software52]
exe=RegDelNull.exe
group=1

[Software53]
exe=regjump.exe
group=1

[Software54]
exe=RootkitRevealer.exe
group=2

[Software55]
exe=sdelete.exe
group=1

[Software56]
exe=ShareEnum.exe
group=2

[Software57]
exe=ShellRunas.exe
group=2

[Software58]
exe=sigcheck.exe
group=1

[Software59]
exe=streams.exe
group=1

[Software60]
exe=strings.exe
group=1

[Software61]
exe=sync.exe
group=1

[Software62]
exe=tcpvcon.exe
group=1

[Software63]
exe=Tcpview.exe
group=2

[Software64]
exe=vmmap.exe
group=2

[Software65]
exe=Volumeid.exe
group=1

[Software66]
exe=whois.exe
group=1

[Software67]
exe=Winobj.exe
group=2

[Software68]
exe=ZoomIt.exe
group=2

-----------------------------------------------------------------------------------------------------

Select file –> save as –> call it sysinternals.nlp –> save it to the sysinternals folder.

Open NirLauncher. Select launcher –> add software package.

When the “Select file package to add” dialogue box comes up. Browse to the sysinternals.nlp file and click open.

You should then see a screen containing the sysinternals software package.

sysinternals

To switch back to the nirsoft suite, select launcher –> previous software package.

Faster Shutdown (Windows Xp)

Note: You should create a restore point before this process i.e. Click Start –> all programs –> accessories –> system tools –> system restore. Select “Create a restore point.” Click next. Under “restore point description” type “shutdown backup” (without quotes). Click create.
-----------------------------------------------------------------------------------------------------

Start –> run –> type “regedit” (without quotes). Hit enter.

Browse to: HKEY_CURRENT_USER\Control Panel\Desktop

Modify the string value: “AutoEndTasks” set the value data to 1.

Modify/Create the string value: “WaitToKillAppTimeout” set the value data to 1000.

Modify/Create the string value: “HungAppTimeout” set the value data to 1000.

Browse to HKEY_LOCAL_MACHINE\SYSTEM\CurrentControlSet\Control

Modify the string value: “WaitToKillServiceTimeout” set the value data to 1000.

Reboot.

Give Administrative Rights To The Guest Account

Start –> run –> type “control userpasswords2” (without quotes).

Under “Users for this computer” highlight the guest account and click properties.

Select the “Group Membership” tab. Under “Other” select the drop down menu and click “Administrators.”

guest

-----------------------------------------------------------------------------------------------------

Click apply –> ok.

Restore The Address Bar Option To The Taskbar (Xp SP3)

Note: You will need the following dll for this tweak: browseui.dll

-----------------------------------------------------------------------------------------------------

Restart your computer.
Before the windows logo, tap the F8 key repeatedly until you are presented with a Windows Advanced Options menu.
Select the option Safe Mode with the arrow keys.
Then press enter on your keyboard to boot into Safe Mode.

68224pick-safe-mode

-----------------------------------------------------------------------------------------------------

Once in safe mode, browse to my computer –> c drive –> windows –> system 32. Copy and paste browseui.dll into the C:\windows\system32 folder. Restart.

Disable Winrar Notification Popup With Ollydbg

Note: you will need to download the following program for this tweak: Ollydbg

-----------------------------------------------------------------------------------------------------

Open Ollydbg. Select file –> open.

Under “look in” select the C drive and browse to program files –> winrar –> winrar.exe. Select open.

winrar2

-----------------------------------------------------------------------------------------------------

If you are presented with the following warning, click ok.

error

-----------------------------------------------------------------------------------------------------

Press ctrl – g on your keyboard and type “0043FF47” at the prompt.

prompt

Click ok.

-----------------------------------------------------------------------------------------------------

Right click on the address that is highlighted. Select binary –> fill with NOPs.

Now right click, select copy to executable –> All modifications.

Disable Winrar Notification Popup With Resource Hacker

Note: You will need to download the following program for this tweak: Resource hacker

-----------------------------------------------------------------------------------------------------

Open resource hacker.  Select file –> open.

Under “look in” select the C drive and browse to program files –> winrar –> winrar.exe. Select open.

winrar

-----------------------------------------------------------------------------------------------------

On the left hand side of recourse hacker, select the plus sign next to “dialogue.”

Scroll down and click the plus sign next to “Reminder.”

Right click 1033 and select “Delete Resource”

deleteresource

You will be asked if you are sure you want to delete the resource. Select yes.

Select file –> save.

Show Your Windows Version On Your Desktop

Start -> Run -> Regedit.

On the left hand side browse to HKEY_CURRENT_USER\Control Panel\Desktop

Modify/Create the DWORD value "PaintDesktopVersion" (without quotes)

Give it the value data 1 and reboot.

Restore The Internet Explorer Desktop Icon

Start -> Run -> Type "Notepad"

Paste the following into notepad:

Windows Registry Editor Version 5.00[HKEY_CURRENT_USER\Software\Microsoft\Windows\CurrentVersion\Explorer\HideDesktopIcons\NewStartPanel]"{871C5380-42A0-1069-A2EA-08002B30309D}"=dword:00000000 [HKEY_CURRENT_USER\Software\Microsoft\Windows\CurrentVersion\Explorer\HideDesktopIcons\ClassicStartMenu]"{871C5380-42A0-1069-A2EA-08002B30309D}"=dword:00000000

File -> save as. Under "Save as type" select All files.

On the left hand side select "Desktop"

Under file name, type: "restore.reg" (without quotes). Select save.

Double click the new registry file. You should get the following warning:


Select yes.

Enable Clear Pagefile At Shutdown

Start -> Run -> Type "Regedit" (without quotes)

Browse to: HKEY_LOCAL_MACHINE\SYSTEM\CurrentControlSet\Control\Session Manager\Memory Management

Modify/Create the DWORD value "ClearPageFileAtShutdown" (without quotes) Give it the value data of 1.

Exit registry and reboot.

Turn Inprivate Filtering On Indefinately (Internet Explorer 8)

Start -> Run -> Notepad.

Paste the following:

Windows Registry Editor Version 5.00


[HKEY_CURRENT_USER\Software\Microsoft\Internet Explorer\Safety\PrivacIE]"StartMode"=dword:00000001

Save it as "Auto.reg" (without quotes).

Double click on the new registry file. A dilogue box asking if you want to add the information to the registry should popup, select yes.

Create Registry Files To Toggle Your Screensaver

Turn The Screen Saver Off

Start -> run -> notepad.

Paste the following:

Registry Editor Version 5.00

[HKEY_CURRENT_USER\Control Panel\Desktop]
"ScreenSaveActive"="0"

save it as "scrnsaveroff.reg" (without quotes)

To activate this file, simply click on it. *see note*

Turn The Screen Saver On

open notepad once again, and paste the following:

Registry Editor Version 5.00

[HKEY_CURRENT_USER\Control Panel\Desktop]
"ScreenSaveActive"="1"

save it as "scrnsaveron.reg" (without quotes)

To activate this file, simply click on it.

(Note: once you click on one of the registry files, a dialogue box will come up asking if you want to add the information to the registry. Click yes.)

Integrate Avira's Virus Scanner Into Winrar

Those of you who use winrar should notice that there's a "virus scanner" located in winrar when you download a file.

This tutorial will show you how to integrate Avira's Luke Filewalker into winrar's virus scan.

Click on virus scan located at the top right of WinRAR


Under Virus scanners found by WinRAR, select: "User defined"

Next to scanner name select browse and locate:

C:\Program Files\Avira\AntiVir_version\avscan.exe

In "Virus scanner parameters" type:

/GUIMODE=1 /PATH="%f"

Select ok.


Changing The Way Avira Antivir Starts

There is always "I change my mind, I want Avira to start early!" Or "Avira is starting early, and it is slowing down my computer!" The question is: how do you change the way it starts?


Start -> Run -> Type cmd.

In cmd type as follows:

1. cd *enter*

2. cd c:\Program Files *enter*

3. cd Avira *enter*

4. cd Antivir Desktop *enter*

5. avconfig.exe /WIZARD *enter*

If you did this correctly, you should see a dialogue box like the one below come up.


Click next several times until you see the "Guard Start Mode." You can select either "Normal start" or "Secure Start."

Get Old Firefox Addons To Work With Newer Builds

1. Open Firefox, type "about:config" into the location bar (without quotes)

2. Click "I'll be careful I promise" when the confirmation page comes up.

3. Below "preference name" right click, select new -> boolean.

4. Call it "extensions.checkCompatibility" (without quotes). Set the value to false.

What this does is disables Firefox from checking addon compatibility. So (after the tweak) when you install an older addon to a newer build of firefox, firefox won't check to see if it's compatible with it and will allow you to install.

Remove .net Framework Assistant From Firefox

(note:before doing step one, firefox should be closed)

1. Locate C:\WINDOWS\Microsoft.NET\Framework\v3.5\Windows Presentation Foundation\DotNetAssistantExtension

2. Delete everything in the folder.

3. Type about:config in the firefox address bar. Under filter type: "general.useragent.extra.microsoftdotnet" (without quotes)

4. Right click on the entry and select reset.

5. Restart Firefox.

Disable All Balloon Tips

1. Start -> Run -> Notepad.

2. Paste the following:

Windows Registry Editor Version 5.00

[HKEY_CURRENT_USER\Software\Microsoft\Windows\CurrentVersion\Explorer\Advanced]
"EnableBalloonTips"=dword:00000000

[HKEY_CURRENT_USER\Software\Microsoft\Windows\CurrentVersion\Explorer\Advanced]
"FolderContentsInfoTip"=dword:00000000

[HKEY_CURRENT_USER\Software\Microsoft\Windows\CurrentVersion\Explorer\tips]
"Show"=dword:00000000

[HKEY_CURRENT_USER\Software\Microsoft\Windows\CurrentVersion\Explorer\Advanced]
"StartButtonBalloonTip"=dword:00000000

[HKEY_CURRENT_USER\Software\Microsoft\Windows\CurrentVersion\Explorer\Advanced]
"ShowInfoTip"=dword:00000000

[HKEY_CURRENT_USER\Software\Microsoft\Windows\CurrentVersion\Policies\Explorer]
"NoSMBalloonTip"=dword:00000000


3. Save it as disableall.reg

4. Double click on disableall.reg, a dialogue box should come up asking if you want to add the information, choose yes.

Backup Your Firefox Passwords

1. Navigate To: My Computer -> C Drive -> Documents And Settings -> User -> Application Data -> Mozilla -> Profiles -> nyj4og2r.default

2. From here locate:

signons.txt

signons3.txt

key3.db

And copy them to the place you want to back them up. To restore them later, just replace the signons and key3.

Create A Batch File To Restart The Dns Service

1. Start -> Run -> Notepad.

2. Paste the following:

net stop dnscache
net start dnscache

3. Call it "restartdns.bat" (without quotes)

Disable The Dns Client Service

1. Start -> Control Panel -> Administrative Tools -> Services.

2. Right click on the dns service and select properties. Under Startup type select disabled. Under service status select stop.

Disable Automatic Expanding Folder Trees

1. Start -> Run -> Regedit.

2. Locate: HKEY_CURRENT_USER\Software\Microsoft\Windows\CurrentVersion\Explorer

3. Modify/Create the Dword value "FriendlyTree" (without quotes)

4. Set the value data to 0.

Add Notepad To Right Click

1. Start -> Run -> Notepad.

2. Paste the following:

Windows Registry Editor Version 5.00

[HKEY_LOCAL_MACHINE\SOFTWARE\Classes\Directory\shell\Notepad]
@="Notepad"

[HKEY_LOCAL_MACHINE\SOFTWARE\Classes\Directory\shell\Notepad\command]
@="C:\\Windows\\notepad"

3. Save it as "notepad.reg"

4. Open it, it will ask you if you want to add the data, select yes.

Display Your Desktop Icons In List View

1. Follow this link and download desktop list view self extracting or zip.

2. Double click the "desktoplistview.exe" and your desktop icons should be organized in list view.

More:

Desktop List View To Start Up When Your Computer Starts

1. Go to start -> All Programs -> Right click on startup and select explore. Copy the desktoplistview.exe into the startup folder.

I Want My Icons Back The Way They Were!

Im sorry to say this, but, you can't, it's impossible (just kidding)

1. Go back to the folder you unzipped desktop list view into and double click "unload.bat" Your icons should now be the way they were before.

Enable/ Disable Windows Media Player Update Message

1. Start -> Run -> Regedit.

2. Locate, HKEY_LOCAL_MACHINE\SOFTWARE\Microsoft\MediaPlayer\PlayerUpgrade

3. Modifty/Create the string value "AskMeAgain"

4. Under value data: No for disable and Yes for enabled.

Create Registry Files To Turn Autoplay On and Off

1. Start -> Run -> Notepad.

2. Paste the following:

(for autoplay on):

Windows Registry Editor Version 5.00

[HKEY_CURRENT_USER\Software\Microsoft\Windows\CurrentVersion\Policies\Explorer]
"NoDriveTypeAutoRun"=dword:00000091
"NoSaveSettings"=dword:00000000

(save as autoplayon.reg)

(for autoplay off):

Windows Registry Editor Version 5.00

[HKEY_CURRENT_USER\Software\Microsoft\Windows\CurrentVersion\Policies\Explorer]
"NoDriveTypeAutoRun"=dword:00000095
"NoSaveSettings"=dword:00000000

(save as autplayoff.reg)

Create A Vbs Script To Change The Registered Owner and Organization

1. Start > Run > Notepad.

2. Paste the following:

Option Explicit

Set ws = WScript.CreateObject("WScript.Shell")
Dim ws, t, p1, p2, n, g, cn, cg
Dim itemtype

p1 = "HKLM\Software\Microsoft\Windows NT\CurrentVersion\"

n = ws.RegRead(p1 & "RegisteredOwner")
g = ws.RegRead(p1 & "RegisteredOrganization")
t = "Change Owner and Organization Utility"
cn = InputBox("Type new Owner and click OK", t, n)
If cn <> "" Then
ws.RegWrite p1 & "RegisteredOwner", cn
End If

cg = InputBox("Type new Organization and click OK.", t, g)
If cg <> "" Then
ws.RegWrite p1 & "RegisteredOrganization", cg
End If

3. Save it as modifyowner.vbs

4. Double click on the file, and a dialogue box like the one below should pop up:


5. Type the owner and click ok. A new dialogue box, like the one below should pop up:


6. Type the Organization and click ok.

Add "Copy To/Move To" To Right Click

1. Start > Run > Notepad.

2. Paste the following:

Windows Registry Editor Version 5.00

[HKEY_CLASSES_ROOT\AllFilesystemObjects\shellex\ContextMenuHandlers]

[HKEY_CLASSES_ROOT\AllFilesystemObjects\shellex\ContextMenuHandlers\Copy To]
@="{C2FBB630-2971-11D1-A18C-00C04FD75D13}"

[HKEY_CLASSES_ROOT\AllFilesystemObjects\shellex\ContextMenuHandlers\Move To]
@="{C2FBB631-2971-11D1-A18C-00C04FD75D13}"

3. save it as add.reg

3. Double click the file, it will ask you if you want to add the information, select yes.

Disable Media Player Update Message

1. Start > Run > Notepad.

2. Paste the following:

Windows Registry Editor Version 5.00

[HKEY_LOCAL_MACHINE\SOFTWARE\Microsoft\MediaPlayer\PlayerUpgrade]
"AskMeAgain"="no"

3. Save it as disableupdatemessage.reg

4. Double click the file, it will ask you if you want to add the information, select yes.

Create A Vbs Script To Enable Or Disable Balloon Tips

1. Start > Run > Notepad.

2. Paste the following:

Option Explicit
On Error Resume Next

Dim WSHShell, n, p, itemtype, MyBox
Set WSHShell = WScript.CreateObject("WScript.Shell")

p = "HKCU\Software\Microsoft\Windows\CurrentVersion\Explorer\Advanced\EnableBalloonTips"

itemtype = "REG_DWORD"

n = WSHShell.RegRead (p)
errnum = Err.Number

if errnum <> 1 then

WSHShell.RegWrite p, 0, itemtype
End If

If n = 0 Then
WshShell.RegWrite p, 1, itemtype
MyBox = MsgBox("Balloon Tips are now ENABLED", 64, "Show or Hide Balloon Tips")
End If

If n = 1 Then
WshShell.Regwrite p, 0, itemtype
MyBox = MsgBox("Balloon Tips are now DISABLED", 64, "Show or Hide Balloon Tips")
End If

Set WshShell = Nothing

3. Save it as balloontips.vbs

4. To disable balloon tips, click on the file. Click on the file once again to enable them.

Disable "Shortcut To" Prefix

1. Start > Run > Regedit.

2. HKEY_CURRENT_USER\Software\Microsoft\Windows\CurrentVersion\Explorer

3. Locate/create the binary value name 'link' Give it the data value: 00 00 00 00

Disable Popup Error Messages During Boot Up

1. Start > Run > Notepad.

2. Paste the following:

Windows Registry Editor Version 5.00

[HKEY_LOCAL_MACHINE\SYSTEM\CurrentControlSet\Control\Windows]
"NoPopupsOnBoot"=dword:00000001


3. save it is disableErrors.reg

3. Double click it, when it asks you if you want to add the information, choose yes.

Shutdown With A Keyboard Shortcut

(note: For this tweak, you will need a free utility called nircmd down loadable here)

1. Right click on your desktop, choose new > shortcut.

2. Paste the following:

nircmd.exe qboxcom "Do you want to Shutdown?" "question" exitwin poweroff

3. Click next, call it "poweroff" (without quotes) Click finish.

4. Now, right click on the shortcut you just made, choose properties. On the shortcut tab under shortcut key, type whatever you want the keyboard shortcut to be e.g. ctrl shift p. Click apply, ok.

Increase Balloon Tip Display

1. Start > Run > Notepad.

2. Paste the following:

Windows Registry Editor Version 5.00

[HKEY_CURRENT_USER\Software\Microsoft\Windows\CurrentVersion\Explorer\TrayNotify]
"BalloonTip"=dword:0000000a

3. Call it increase.reg

4. Double click it, it will ask you if you want to add the information, click yes.

Create A Shortcut To Remove Hardware

1. Right click new > shortcut.

2. Paste the following:

RunDll32.exe shell32.dll,Control_RunDLL hotplug.dll

3. Click next > call it 'Remove Hardware' (without quotes) > Click finish

Disable Autoplay (Xp Home)

1. Start > Run > Regedit.

2. HKEY_LOCAL_MACHINE\SYSTEM\CurrentControlSet\Services\Cdrom

3. Edit/Create the value 'AutoRun' and set the value data to 0.

Disable New Hardware Found Messages

1. Right click on my computer > select properties > hardware tab > windows update.

2. Select 'Never Search Windows Update For Drivers.'

One Click System Restore

1. Start > Run > Notepad

2. Paste the following:

Set IRP = getobject("winmgmts:\\.\root\default:Systemrestore")
MYRP = IRP.createrestorepoint ("My RestorePoint", 0, 100)

3. Save it as restore.vbs

4. Double click on the vbs script to create a restore point.

Create A Shortcut To Remotely Shutdown Computers

1. Right Click > New > Shortcut.

2. Paste the following:

%windir%\system32\shutdown.exe -i

3. Click next > Call it remote shutdown > click finish.

Move The Menu Bar Back To The Top Of The Screen In IE7

1. Start > Run > Notepad.

2. paste the following:

REGEDIT4

[HKEY_CURRENT_USER\Software\Microsoft\Internet Explorer\Toolbar\WebBrowser\]
"ITBar7Position"=dword:00000001

3. Save it as menubar.reg.

4. Double click the file and allow it to add information to the registry.

5. Restart IE 7

Add Programs To The Send To Menu

1. My computer > tools > folder options.

2. On the view tab, under hidden files and folders select 'show hidden files and folders.'

3. My computer > C drive > Documents and Settings > default user > send to.

4. From here, add programs that you would like to be featured in the send to menu.

Change PC Name through Batch Script

1. Open Notepad

2. Paste the following:
@echo off
SET /P PCNAME=Please enter your desired PC name:
REG ADD HKLM\SYSTEM\CurrentControlSet\Control\ComputerName\ComputerName /v ComputerName /t REG_SZ /d %PCNAME% /f

3. Save as Change PC Name.bat

Note: This requires administrative privileges.

Create A Batch File To Run Disk Clean Up In A Special Mode

1. Start > Run > Notepad.

2. Paste the following:

c:\windows\system32\cleanmgr.exe /dc /sageset: 1
c:
cd \
cd c:\windows\prefetch
del *.* /q

3. Save it as clean.bat

4. Double click on the batch file and select the files you want to clean > click ok.

Apply A Password To The Guest Account

1. Start > Control Panel > User accounts. Make sure the guest account is enabled.

2. Start > Run > Cmd.

3. Paste the following: Net user guest password

4. hit enter. Go back to User accounts and select the guest account > select 'create password'

Disable Prefetch

1. Start > Run > Regedit.

2. HKEY_LOCAL_MACHINE\SYSTEM\CurrentControlSet\Control\Session Manager\Memory Management\PrefetchParameters

3. Locate the value 'EnablePrefetcher' and set the value data to 0.

Delete Unused Fonts To Speed Up The Start Time Of Windows

1. Start > Control Panel.

2. Fonts

3. Select Several fonts right click > delete.

(Warning, if you arn't sure which fonts are safe to delete, download this freeware program: Fontfrenzy)

Create A Shortcut To Abort Shutdown

1. Right click > new > shortcut.

2. paste the following:

c:\windows\system32\shutdown.exe -a

3. Click next call it > abort shutdown > click ok.


Disable Recent Documents History

1. Start > Run > Regedit.

2. HKEY_CURRENT_USER\Software\Microsoft\Windows\CurrentVersion\Policies\Explorer

3. Modify/Create the Dword Value 'NoRecentDocsHistory' (without quotes)

4. Give it a value data of 1.

Enable/Disable Boot Defrag

1. Start > Run > Regedit.

2. HKEY_LOCAL_MACHINE\SOFTWARE\Microsoft\Dfrg\BootOptimizeFunction

3. Double click 'Enable' and change the value data to Y to enable boot defrag and N to disable it.

Disable Autoplay

1. Start > Run > Gpedit.msc

2. Computer Configuration > Administration Templates > System.

3. On the right double click 'Turn off autoplay'

4. Select Enable, on the dropdown menu select all drives.

5. Click ok > apply > ok.

Create A Batch File To Kill Unresponsive Tasks

1. Start > Run > Notepad.

2. paste the following:

@echo off
taskkill.exe /f /fi "status eq not responding"
exit

3. File > Save as > call it killtasks.bat

Use Open DNS For Faster Web Browsing

1. Start > Control Panel > Network Connections.

2. Right click on your default connection, select properties.

3. Under 'This connection uses the following items' double click 'Internet Protocol (TCP/IP)'

4. On the general tab select 'Use the following DNS server address'

5. On preferred DNS server put: 208 . 67 . 222 . 222

6. On alternate DNS server put: 208 . 67 . 220. 220


7. Click ok > ok.

Make XP Start Up Faster

1. Start > Run > Regedit.

2. HKEY_LOCAL_MACHINE\SYSTEM\CurrentControlSet\Control\ContentIndex

3. Locate the value 'StartupDelay'

4. Select Decimal, change the value data to 40000

Customize The Open With Menu

1. Start > Run > Regedit

2. KEY_CURRENT_USER > SOFTWARE > MICROSOFT > WINDOWS > CURRENTVERSION > EXPLORER > FILEEXTS.

3. Open the extension you want to modify and select 'OpenWithList'

4. On the right add or remove programs that you want to show up on the open with menu.

Rename The Administrator Account

1. Start > Run > type 'control userpasswords2' (without quotes) > hit enter

2. On the users tab click the account name 'Administrator' > select properties.

3. On the general tab look for user name and change the name from Administrator.

Force Use Of Classic Control Panel (XP Professional)

1. Start > Run > GPEDIT.MSC

2. user confiuration > administration templates.

3. On the right double click 'force classic control panel style'

4. Select enable. Click apply > ok.

Force Unresponsive Programs To End When Shutting Down

1. Start > Run > Regedit.

2. HKEY_USERS\.DEFAULT\Control Panel\Desktop

3. Modify/Create The value '
AutoEndTasks' (without quotes)

4. Set the value data to 1

Force Use Of Classic Control Panel

1. Start > Run > Notepad.

2. Paste the following:

[HKEY_CURRENT_USER\Software\Microsoft\Windows\CurrentVersion\Policies\Explorer]
"ForceClassicControlPanel"=dword:00000001

3. Save it is 'ForceClassicControlPanel.reg' (without quotes)

4. Double click
ForceClassicControlPanel.reg > You will be prompted to add the information, click yes.

Note: See also Force Use of Classic Control Panel (Xp Professional)

Repair System Restore

1. Start > Run > type %Windir%\INF > Hit enter.

2. Locate the file name 'SR.INF' (may also be called sr)

3. Right click on it, select > install.

Unblock A Website That Has Been Blocked By Malware/Virus

1. Start > My computer > C drive > Windows > System 32 > Drivers > etc > open the Hosts file with notepad.

2. At the bottom, on a new line, paste in the ip address of the site and the site you want to access.

3. Save it.

Relocate Your Cursor With The ctrl Key

1. Start > Control Panel > Mouse.

2. On the pointer options tab check 'show location of pointer when I press the CTRL key.'

Show The Administrator Account On The Windows Welcome Screen

1. Start > Run > Regedit.

2. HKEY_LOCAL_MACHINE\SOFTWARE\Microsoft\Windows NT\CurrentVersion\Winlogon\SpecialAccounts\UserList

3. Modify/create the value Administrator, set the value data to 1.

Enable Automatic Logon

1. Start > Run > Regedit.

2. HKEY_LOCAL_MACHINE\SOFTWARE\Microsoft\Windows NT\CurrentVersion\Winlogon

3. Locate the value name
AutoAdminLogon set the value data to 1.

(make sure your user is set in the value 'DefaultUserName' if not double click the value name and place in the user you want to automatically log in. Also if you have a password type it in the value data of 'defaultpassword.')

Disable System Beeps

1. Start > Run > Regedit.

2. HKEY_CURRENT_USER\Control Panel\Sound

3. Modify the value 'beeps' set the value data to no.

Diable Autorun

Start -> Run -> Regedit.

Browse to:

HKEY_CURRENT_USER\Software\Microsoft\Windows\CurrentVersion\Policies\Explorer

Locate the Dword Value "NoDriveTypeAutoRun" Change the value data to 0xFF

Disable Notification Area Balloon Tips

1. Start > Run > Regedit.

2. Locate, HKEY_CURRENT_USER\Software\Microsoft\Windows\CurrentVersion\Explorer\Advanced

3. Find the value
EnableBalloonTips (or right click new >key call it EnableBalloonTips set the value data to 0)

Control how much disk space System Restore uses

1. Right click on my computer > select Properties.

2. On the system restore tab under disk space usage, drag the slider to the right to increase the amount of disk space, and to the left to decrease it.

Change The Password For Users On The Computer Using Cmd

Start > run > cmd.

type
net user
net user 'user'
net user 'user' *

Type the new password > verify it.

Toggle Auto Starting Programs

Start > run > msconfig.

In the start up tab uncheck the programs you don't want to auto start > click apply > ok.

Stop Windows From Hiding Inactive Icons

Right click on the taskbar > select properties.

On the taskbar tab untick 'hide inactive icons'

Create A Shorcut To Shutdown and/or Restart The Computer

Right click anywhere and select new > shortcut.

For shutdown put: shutdown -s -t 60 -c " " click next > type in the name of the shortcut > click ok

For restart put:
shutdown -r -t 60 click next > type in the name of the shortcut > click ok

Uninstall Microsoft Internet Explorer

Start > Control Panel > Add or Remove Programs > Add/Remove Windows Components.

Uncheck Internet Explorer > click next.

Make A Batch File to Automatically Renew Your Ip-Address

Start > All Programs > Accessories > Notepad.

paste the following:

ipconfig /flushdns
ipconfig /release
ipconfig /renew
exit

Save it as renew.bat

Remove The Recycle Bin From The Desktop

Start > Run > Type Regedit > Hit Enter.

locate
HKEY_LOCAL_MACHINE/SOFTWARE/Microsoft/Windows/CurrentVersion/Explorer/Desktop/NameSpace


Find the key "645FF040-5081-101B-9F08-00AA002F954E"


Delete it.

Disable Indexing Service

Start > Control Panel > Add or Remove Programs > Add or Remove Windows Components.

Uncheck The indexing service, click next.

Enable Clear Type

Start > Control Panel > Display.

On the appearance tab select effects.

Under use the following method to smooth edges of screen fonts select clear type.

Disable Sounds In XP

Start > Control Panel > Sounds and Audio Devices.

In the sounds tab under sound scheme select no sounds.

click apply > ok.

Disable Suggestions In Firefox

Type about:config in the location bar > locate browser.urlbar.maxRichResults.

Set the value to 0.

Block Websites Permanantly

Open My Computer > c drive > windows > system 32 > drivers > etc.

Now open the file named hosts with notepad.


next to 127.0.0.1 put the websites you want to block.

Create A Shortcut To Flush XP DNS

Start > All Programs > Accessories > Notepad.

Paste the following: ipconfig /flushdns

Save it as 'flushdns.bat'

Cannot Flush DNS Error

Start > Run > type services.msc. Make sure the dns client is started.

if the dns client isn't started right click on it > select properties.

In the general tab look for start up list and select automatic.

Click start > apply > ok.

Make A Shortcut To Log Out Of The Computer

Start > All Programs > Accessories > notepad.

Paste the following:
cd\
shutdown -l -f

Save it as logoff.bat

Clear XP DNS

Start > Run > cmd > hit enter.

At the prompt type ipconfig /flushdns > hit enter.

Turn Off System Restore

Right click on my computer > select properties.

In the system restore tab check 'turn off system restore.'

Make The Quick Launch Icons Larger

Right click on the task bar > untick 'lock the tasbar.'

Now right click on an open space in the quick launch bar and select view > large icons.

Confirm Open After Download

Start > My Computer > Tools > Folder Options.

In the files types tab select the type of file you would like your computer to confirm open. Click advanced and tick 'confirm open after download.'

Add A Website Link To The Start Menu

Start > All Programs > Accessories > Notepad.

Paste the following:

[HKEY_CLASSES_ROOT\CLSID\{2559a1f6-21d7-11d4-bdaf-00c04f60b9f0}]
@="WEBSITE"

[HKEY_CLASSES_ROOT\CLSID\{2559a1f6-21d7-11d4-bdaf-00c04f60b9f0}\DefaultIcon]
@="%SystemRoot%\\system32\\shell32.dll,-47"

[HKEY_CLASSES_ROOT\CLSID\{2559a1f6-21d7-11d4-bdaf-00c04f60b9f0}\Instance\InitPropertyBag]
"CLSID"="{13709620-C279-11CE-A49E-444553540000}"
"method"="ShellExecute"
"Command"="WEBSITE"
"Param1"="http://WEBSITE.com"

replace "website" with the link you want.

Now save it as website.reg

Hide Your User From The Control Panel

Start > Run > type gpedit.msc.
Navigate to user configuration > Administrative Templates > Control Panel.

On the right select 'hide specific control panel applets.' Enable it > apply > add item, call it nusrmgt.cpl. Click ok.

Run A Program In Compatibility With Older Versions Of Windows

Right click on the program you want to change compatibility with > select properties > on the compatibility tab, select 'run this program in compatibility mode for.' Select the version of windows.

Make A Blue Screen Of Death

Start > All Programs > Accessories > Notepad.

Paste the following:

@echo off
cd /
cls
color 17
echo A problem has been detect
ed and Windows has been shut down to prevent damage
echo to your computer.
echo.
echo The problem seems to be caused by the following file: SPCMDCON.SYS
echo.
echo PAGE_FAULT_IN_NONPAGED_AREA
echo.
echo If this is the first time you've seen this stop error screen,
echo restart your computer. If this screen appears again, follow
echo these steps:

echo.
echo Check to make sure any new hardware or software is properly installed.
echo If this is a new installation, ask your hardware or software manufacturer
echo for any Windows updates you might need.
echo.
echo If problems continue, disable or remove any newly installed hardware
echo or software. Disable BIOS memory options such as caching or shadowing.
echo If you need to use Safe Mode to remove or disable components, restart
echo your computer, press F8 to select Advanced S
tartup Options, and then
echo select Safe Mode.
echo.
echo Technical information:
echo.
echo *** STOP: 0x00000050 (0xFD3094C2,0x00000001,0xFBFE7617,0x0000 0000)
echo.
echo.
echo *** SPCMDCON.SYS - Address FBFE7617 base at FBFE5000, DateStamp 3d6dd67c
pause :nul
cls

echo Downloading viruses . . .
ping localhost -n 5 :nul
dir /s
pause :nul

Save this as bsod.bat


(To open it if full screen hit alt+enter while the window is open)

Disable Search Suggestions (Firefox)

Right click on the search bar untick Show Suggestions.

Add The Administrator User To The Log On Screen

Start > Run > Regedit > HKEY_LOCAL_MACHINE \ SOFTWARE \ Microsoft \ Windows NT \ CurrentVersion \ Winlogon \ SpecialAccounts \ UserList.

Right click select new > Dword Value. Name the new value Administrator. Click on it, in value data put 1.

Change The Log On Screen Color

Start > Run > Regedit > HKEY_USERS\.DEFAULT\Software\Microsoft\Windows\CurrentVersion\ThemeManager

Modify the 'ColorName' key value. Set it to either Homestead or Metallic.

Disable The Sound And Devices Icon In The Task Bar

Start > Control Panel > Sounds And Devices.

In the Volume Tab untick 'place volume icon in the task bar.'

Completely Disable AutoArrange

Start > Run > Type Regedit > HKEY_USERS\.DEFAULT\Software\Microsoft\Windows NT\CurrentVersion\Program Manager\Settings

Modify the
REG_DWORD value: "AutoArrange" to 0.

Win In Solitare By Cheating

Start > all programs > games > solitaire. Now hold alt+shift+2 and let go.

Hide A Folder

Right click anywhere select new > folder.

For the name of the folder hold alt+0160.

Now right click on the folder on the customize tab select change icon.

Look for a blank icon. Click apply > ok.

Turn Off The Clicking Sounds On XP

Start > Control Panel > Sounds and Audio Devices

Go to the sounds tab and in program events look under windows explorer. Select Start Navigation. In the drop down menu select none.

Skip The Welcome Screen On Log On

1. Start>run>control userpasswords2>untick users must enter a user name and password to log onto this computer>click apply>enter the password>click ok.


Use Small Icons In The Start Menu

1. Right click on start menu>select properties or start>control panel>start menu.

2. In the start menu tab choose customize>in select an icons size for programs change it to small icons.

Stop The Start Menu From Remembering Your Most Used Applications

1. Right click on the start menu>choose properties or start>control panel>taskbar and start menu.

2. In the start menu tab choose customize>change the number in number of programs on start menu to 0>click apply.

Delete Restore Points

1. Start>all programs>accessories>system tools>disk clean up>more options tab>system restore>clean up>click yes.

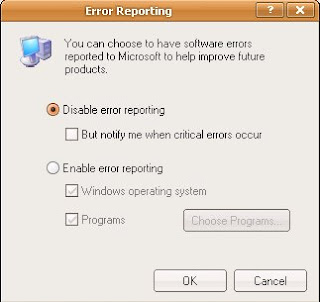
Disable Error Reporting

1. Right click on my computer>select properties>advanced tab>error reporting>select disable error reporting>click apply.

Title (the song that plays when you install xp)

1. start>my computer>disk c>windows>system 32>oobe>images>title. Pretty good song actually.

Change The Windows Media Player Title Bar

1. Start>run>type regedit>hit enter>HKEY_CURRENT_USER>Software>Policies>Microsoft>right click>new>key>paste WindowsMediaPlayer>create the value name TitleBar>in value data put whatever you want the windows media player title bar to say.

Make A Shorcut To Start Google Chrome In Incognito Mode

Create a shortcut of Google chrome>right click on it>select properties>shortcut tab>in target paste --incognito at the end>click apply>click ok.

Microsoft Windows Malicious Software Removal Tool

Microsoft has a built in malicious software removal tool right on your system. To locate it go to my computer>drive c>windows>system 32>look for mrt>open it.

Stop Your Computer From Rebooting After Automatic Updates

1. Start>run>type regedit>hit enter>navigate to HKEY_LOCAL_MACHINE>SOFTWARE>Policies>Microsoft>Windows>WindowsUpdate>AU> create/modify NoAutoRebootWithLoggedOnUsers>set the value to 1

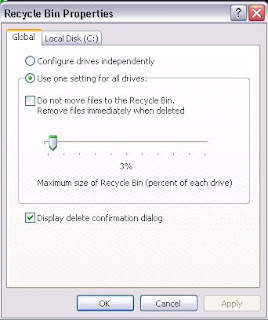
Toggle Delete Confirmation

1. Right click on recycle bin>properties>global tab>uncheck display delete confirmation dialog.

Skip Open Web Server Prompt

1. start>run>regedit>
HKEY_CURRENT_USER>Software>Microsoft>Windows>CurrentVersion>Explorer>modify/create internetopenwith>set the value to 0.

Make A Shorcut To Switch Users

1. Right click on desktop>new>shortcut>paste the following, c:\windows\system32\tsdiscon.exe>click next>finish.

Make The Start Menu Load Faster

1. HKEY_CURRENT_USER>Control Panel>Desktop>Modify MenuShowDelay>change the value to 0 or 1

, ,

Rename The Recycle Bin

1. Start>run>type Regedit>hit enter>HKEY_CLASSES_ROOT>CLSID>645ff040-5081-101b-9FO8.....>modify default>Enter anything e.g. 'trash'

Disable Automatic Restart On Sytem Failures

1. Right click on my computer>click properties>Advanced tab>In startup and recovery select settings>uncheck automatically restart>click ok>reboot.

Modify Internet Explorer Title Bar

1. start>run>regedit>HKEY_CURRENT_USER>Software>Microsoft>Internet Explorer>Main>Create the Value Name [Window Title]>double click on it>in value data, enter desired text.

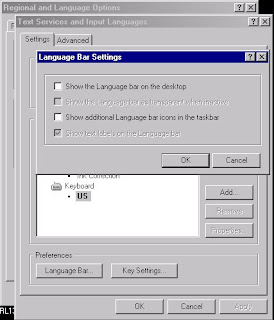
Disable The Language Bar From Auto-Starting

1. Go to control panel>regional and language options>click on the languages bar>details>language bar>uncheck 'show language bar on the desktop'

Click ok the amount of times needed.

Renew Your Ip Address

1. Start>run>cmd>type ipconfig/ release>hit enter>then type ipconfig/ renew>hit enter

2. You now have a new ip address.

Disable Google Suggestions

On the Google home page go to preferences > in query suggestions select 'Do not provide query suggestions in the search box.' Select Save.

Get Show Desktop Back (quick launch bar)

1. start>run>type notepad>hit enter>past the following,
[Shell]
Command=2
IconFile=explorer.exe,3
[Taskbar]
Command=ToggleDesktop

2. File>save as>save it as
'Show desktop.scf' (without quotes)

3. You have now recreated the show desktop icon! Now just go back to where you saved it, and drag it over to your quick launch bar.

Create a Batch File To Automatically Delete System Prefetch

1. Open up notepad. Paste the following code del C:\Windows\Prefetch\*.* /Q

2. Go to file>save as>call it delprefetch.bat>select save.

Change The Text In The Start Menu

Note: for this tweak you will need to download the following: Resource Hacker
Note: You should backup explorer.exe and create a restore point i.e.

Backup explorer.exe: Go to my computer>local disk c>windows>then right click on explorer and click copy.


Go back to my computer>local disk c>right click>new>folder>call it backup>open it up>paste in explorer.exe

Create a restore point: Start>All programs>Accessories>system tools>system restore.


Open resource hacker, select file>open. In the dropdown menu select local disk c>windows>explorer.exe>select open.


On the left side of the screen click the plus’s next to string table>37>1033>in the dialog box highlight start and change it to whatever you want, i.e. like stop. 

Note: if your using windows classic it will be 38 instead of 37


Click “compile script”>file>save as>call it whatever you want i.e. explorerhack.exe

Now go to start>run>type regedit>hit enter>browse to HKEY_LOCAL_MACHINE>SOFTWARE>Microsoft>Windows NT>CurrentVersion>click Winlogon>in the dialog box double click shell>call it what you called the new start menu script, in this case explorerhack.exe


Click ok>restart your computer

,

Cannot Create Toolbar (quick launch)

Troubleshooting method 1: select run>type IE4UINIT.EXE and hit enter.

Troubleshooting method 2: start>run>type REGSVR32 /i SHELL32.DLL

Disable Automatic Window Resizing In Firefox

Open a new tab>type about:config (hit enter)>you may get this message


Click 'I'll be careful I promise'>in the filter bar at the top type, resize. You should get results like this


Change the value of 'dom.disable_window_move_resize' to true

Related Posts Plugin for WordPress, Blogger...